Documentation Index
Fetch the complete documentation index at: https://docs.syllable.ai/llms.txt
Use this file to discover all available pages before exploring further.
A voice group (fka language group) is a group of languages and voices that your agents have access to. You can use the voice groups feature to create a set of languages with their associated voices and DTMF options. Then, you can link the voice group to one or more agents, and update the agents’ messages to include a menu based on the voice group so that the user can change languages if desired at the beginning of the conversation.
Create voice group
To create a new voice group, click “Voices” on the left navbar.
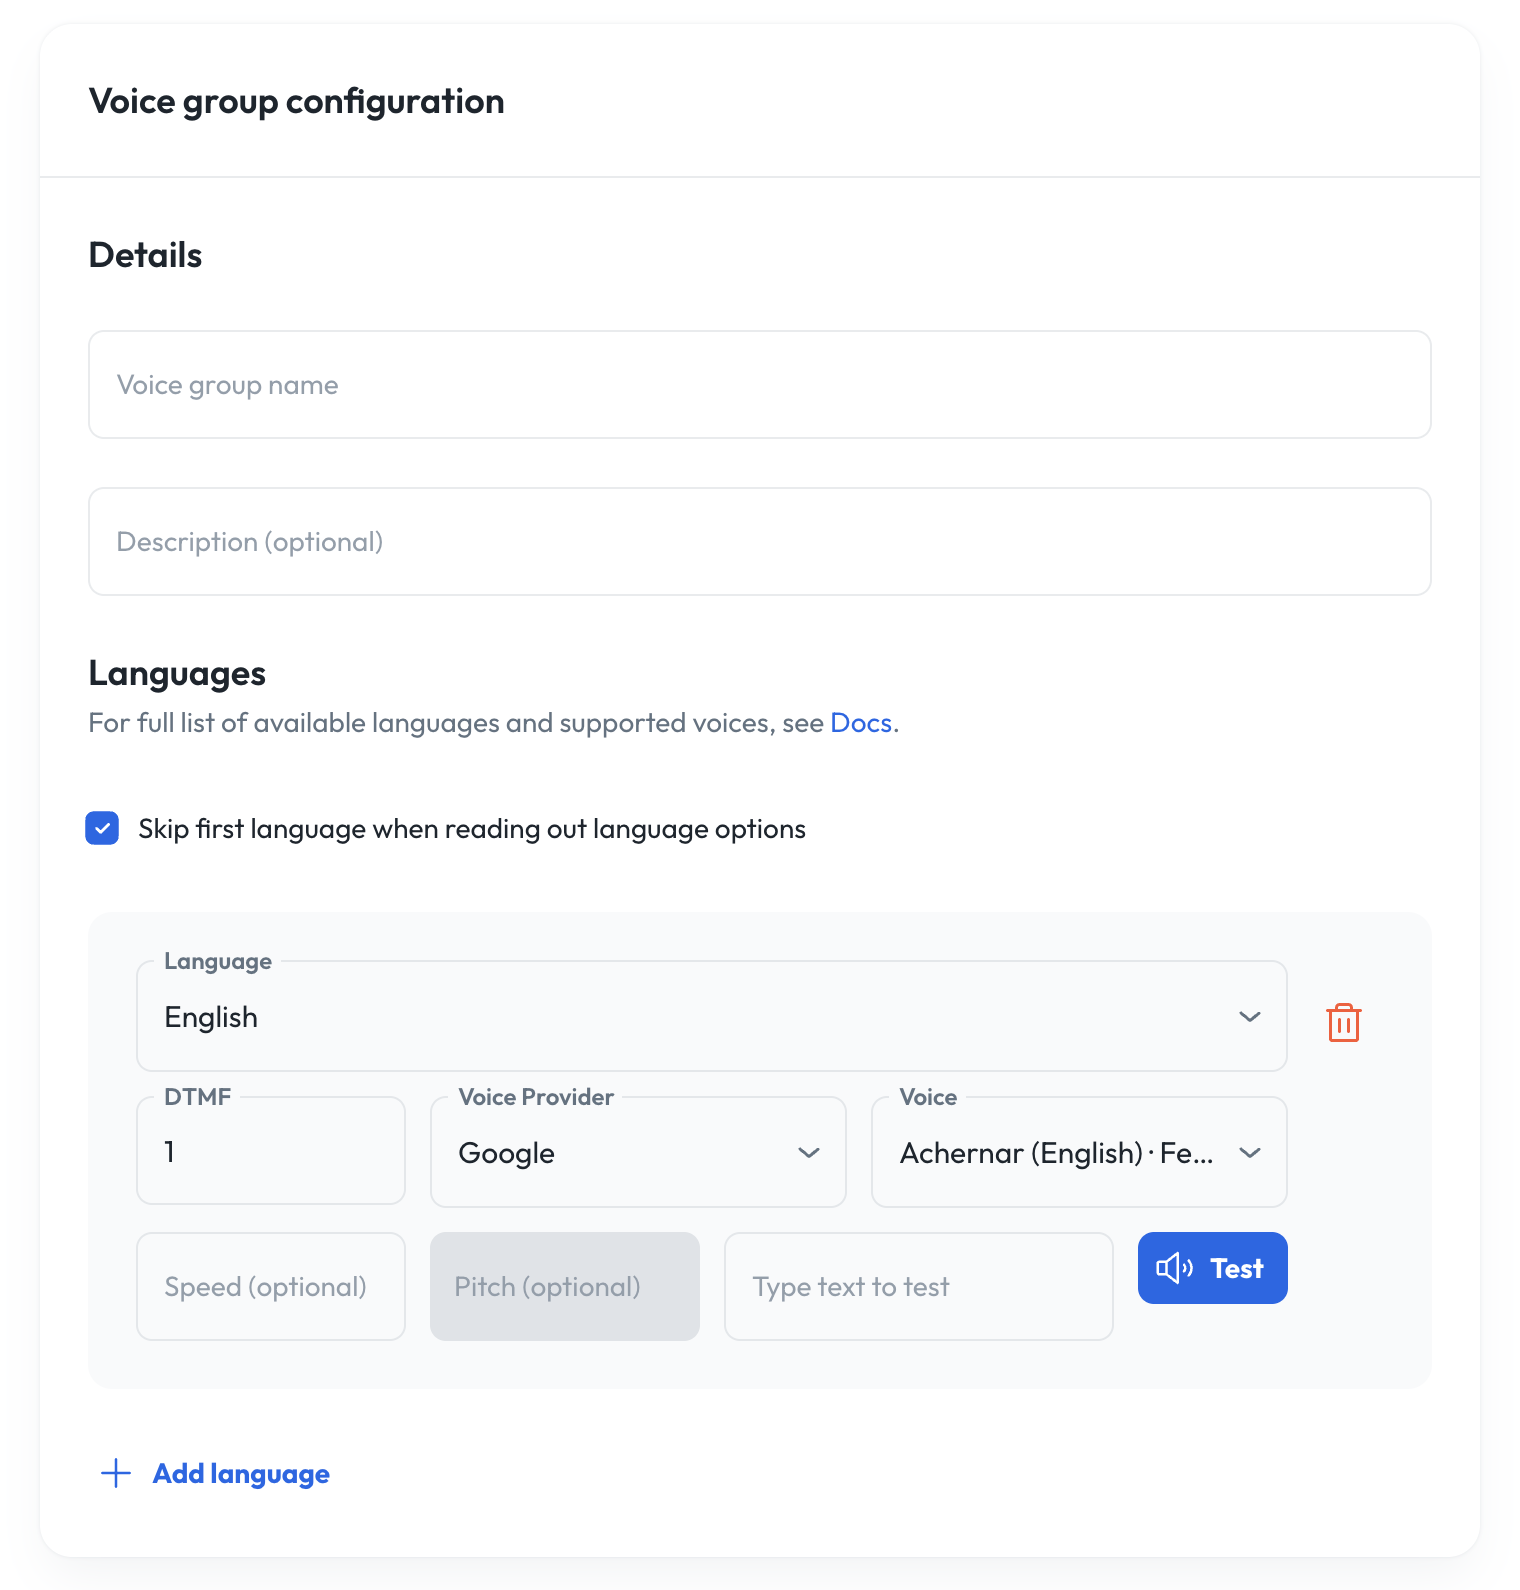
- Voice group name: The name of the voice group (must be unique within organization)
- Description (optional): Description of the voice group.
- Languages: Here you can select which languages are associated with the language group. For each language, you must enter a DTMF code (a number between 1 and 9, inclusive), select a voice provider, and select a voice from that provider. Note that your voice options are limited to voices that support the selected language. Each language in the group must be unique and have a unique DTMF code.
- The option “Skip first language when reading out language options” allows you to omit the first language in the group from the DTMF menu presented as part of the greeting message (see below). You can also configure speed and pitch (depending on if the voice being used supports it), both of which take decimal numbers.
To give an agent access to a voice group’s languages:
- Create a voice group as outlined above.
- Navigate to the agent. Your voice group should appear as an option in the Voice Group field on the agent edit screen. Select the voice group and save changes.
- Navigate to the agent’s message. Insert the tag
{{ language.mode }} into the message (and/or the text of any message rules) where you would like the language selection menu to be delivered by the agent. Save changes.
Now, when a user converses with your agent, at the beginning of the conversation it will deliver its associated message as normal, but at the point at which you inserted the {{ language.mode }} tag, it will instead read off a menu automatically generated from the voice group linked to the agent.
For example, for the voice group with:
English - DTMF 1
Spanish - DTMF 2
Chinese - DTMF 3
For English, press 1.
Para Español, oprima el 2.
中文请按 3.
Para Español, oprima el 2.
中文请按 3.
Dynamic language switching
In addition to the keypad-based DTMF menu, callers can switch languages at any point in the session by speaking naturally—no digit press required. See Dynamic language switching in the Agents guide for setup instructions and behavior details.
Available voices and languages
Google Cloud Text‑to‑Speech
| Voice | Gender | Model | Languages |
|---|
| Aoede | Female | Chirp 3 HD | en‑US, ko‑KR, zh‑CN, es‑US, th‑TH, vi‑VN |
| Charon | Male | Chirp 3 HD | en‑US, ko‑KR, zh‑CN, es‑US, th‑TH, vi‑VN |
| Fenrir | Male | Chirp 3 HD | en‑US, ko‑KR, zh‑CN, es‑US, th‑TH, vi‑VN |
| Kore | Female | Chirp 3 HD | en‑US, ko‑KR, zh‑CN, es‑US, th‑TH, vi‑VN |
| Leda | Female | Chirp 3 HD | en‑US, ko‑KR, zh‑CN, es‑US, th‑TH, vi‑VN |
| Orus | Male | Chirp 3 HD | en‑US, ko‑KR, zh‑CN, es‑US, th‑TH, vi‑VN |
| Puck | Male | Chirp 3 HD | en‑US, ko‑KR, zh‑CN, es‑US, th‑TH, vi‑VN |
| Zephyr | Female | Chirp 3 HD | en‑US, ko‑KR, zh‑CN, es‑US, th‑TH, vi‑VN |
| en‑US‑Neural2‑D | Male | Neural2 | en‑US |
| en‑US‑Neural2‑F | Female | Neural2 | en‑US |
| es‑US‑Neural2‑A | Female | Neural2 | es‑US |
| es‑US‑Neural2‑B | Male | Neural2 | es‑US |
| ko‑KR‑Neural2‑A | Female | Neural2 | ko‑KR |
| vi‑VN‑Neural2‑A | Female | Neural2 | vi‑VN |
| cmn‑TW‑Wavenet‑A | Female | WaveNet | cmn‑TW |
| yue‑HK‑Standard‑C | Female | Standard | yue‑HK |
| en‑US‑Studio‑O | Female | Studio | en‑US |
OpenAI Text‑to‑Speech
| Voice | Gender | Model | Languages |
|---|
| Alloy | Male | TTS‑1 | en‑US, ko‑KR, zh‑CN, fa‑IR, es‑US, th‑TH, vi‑VN |
| Ash | Male | TTS‑1 | en‑US, ko‑KR, zh‑CN, fa‑IR, es‑US, th‑TH, vi‑VN |
| Coral | Female | TTS‑1 | en‑US, ko‑KR, zh‑CN, fa‑IR, es‑US, th‑TH, vi‑VN |
| Echo | Female | TTS‑1 | en‑US, ko‑KR, zh‑CN, fa‑IR, es‑US, th‑TH, vi‑VN |
| Fable | Female | TTS‑1 | en‑US, ko‑KR, zh‑CN, fa‑IR, es‑US, th‑TH, vi‑VN |
| Nova | Female | TTS‑1 | en‑US, ko‑KR, zh‑CN, fa‑IR, es‑US, th‑TH, vi‑VN |
| Onyx | Male | TTS‑1 | en‑US, ko‑KR, zh‑CN, fa‑IR, es‑US, th‑TH, vi‑VN |
| Sage | Male | TTS‑1 | en‑US, ko‑KR, zh‑CN, fa‑IR, es‑US, th‑TH, vi‑VN |
| Shimmer | Female | TTS‑1 | en‑US, ko‑KR, zh‑CN, fa‑IR, es‑US, th‑TH, vi‑VN |
ElevenLabs
| Voice | Gender | Model | Languages |
|---|
| Alice | Female | eleven_flash_v2_5 | en‑US, ko‑KR, zh‑CN, es‑US |
| Bill | Male | eleven_flash_v2_5 | en‑US, ko‑KR, zh‑CN, es‑US |
| Brian | Male | eleven_flash_v2_5 | en‑US, ko‑KR, zh‑CN, es‑US |
| Callum | Male | eleven_flash_v2_5 | en‑US, ko‑KR, zh‑CN, es‑US |
| Charlie | Male | eleven_flash_v2_5 | en‑US, ko‑KR, zh‑CN, es‑US |
| Charlotte | Female | eleven_flash_v2_5 | en‑US, ko‑KR, zh‑CN, es‑US |
| Chris | Male | eleven_flash_v2_5 | en‑US, ko‑KR, zh‑CN, es‑US |
| Daniel | Male | eleven_flash_v2_5 | en‑US, ko‑KR, zh‑CN, es‑US |
| Eric | Male | eleven_flash_v2_5 | en‑US, ko‑KR, zh‑CN, es‑US |
| George | Male | eleven_flash_v2_5 | en‑US, ko‑KR, zh‑CN, es‑US |
| Jessica | Female | eleven_flash_v2_5 | en‑US, ko‑KR, zh‑CN, es‑US |
| Laura | Female | eleven_flash_v2_5 | en‑US, ko‑KR, zh‑CN, es‑US |
| Liam | Male | eleven_flash_v2_5 | en‑US, ko‑KR, zh‑CN, es‑US |
| Lily | Female | eleven_flash_v2_5 | en‑US, ko‑KR, zh‑CN, es‑US |
| Matilda | Female | eleven_flash_v2_5 | en‑US, ko‑KR, zh‑CN, es‑US |
| River | Male | eleven_flash_v2_5 | en‑US, ko‑KR, zh‑CN, es‑US |
| Roger | Male | eleven_flash_v2_5 | en‑US, ko‑KR, zh‑CN, es‑US |
| Sarah | Female | eleven_flash_v2_5 | en‑US, ko‑KR, zh‑CN, es‑US |
| Will | Male | eleven_flash_v2_5 | en‑US, ko‑KR, zh‑CN, es‑US |
- Log into the Syllable Console
- Click the Voices tab, then select New Voice Group
- Name your new Voice Group.
- Select the default language.
- Pick a voice provider.
- Click the speaker icon to listen to a sample of the voice you want to hear.
- Tweak the Voice Speed and Pitch to your liking. We recommend small increments to maintain a human timbre.
Pronunciations
Text-to-Speech systems often mispronounce proper nouns, brands, acronyms, and medical terms. Pronunciations will allow users to correct how agents pronounce words so that users can ensure agents are properly and clearly communicating with callers.
- Note: Pronunciations are organization-wide and affect all agents using voices and languages.
Upload pronunciations
To upload pronunciations, go to “Voices” in the sidenav and click on the Pronunciations tab.
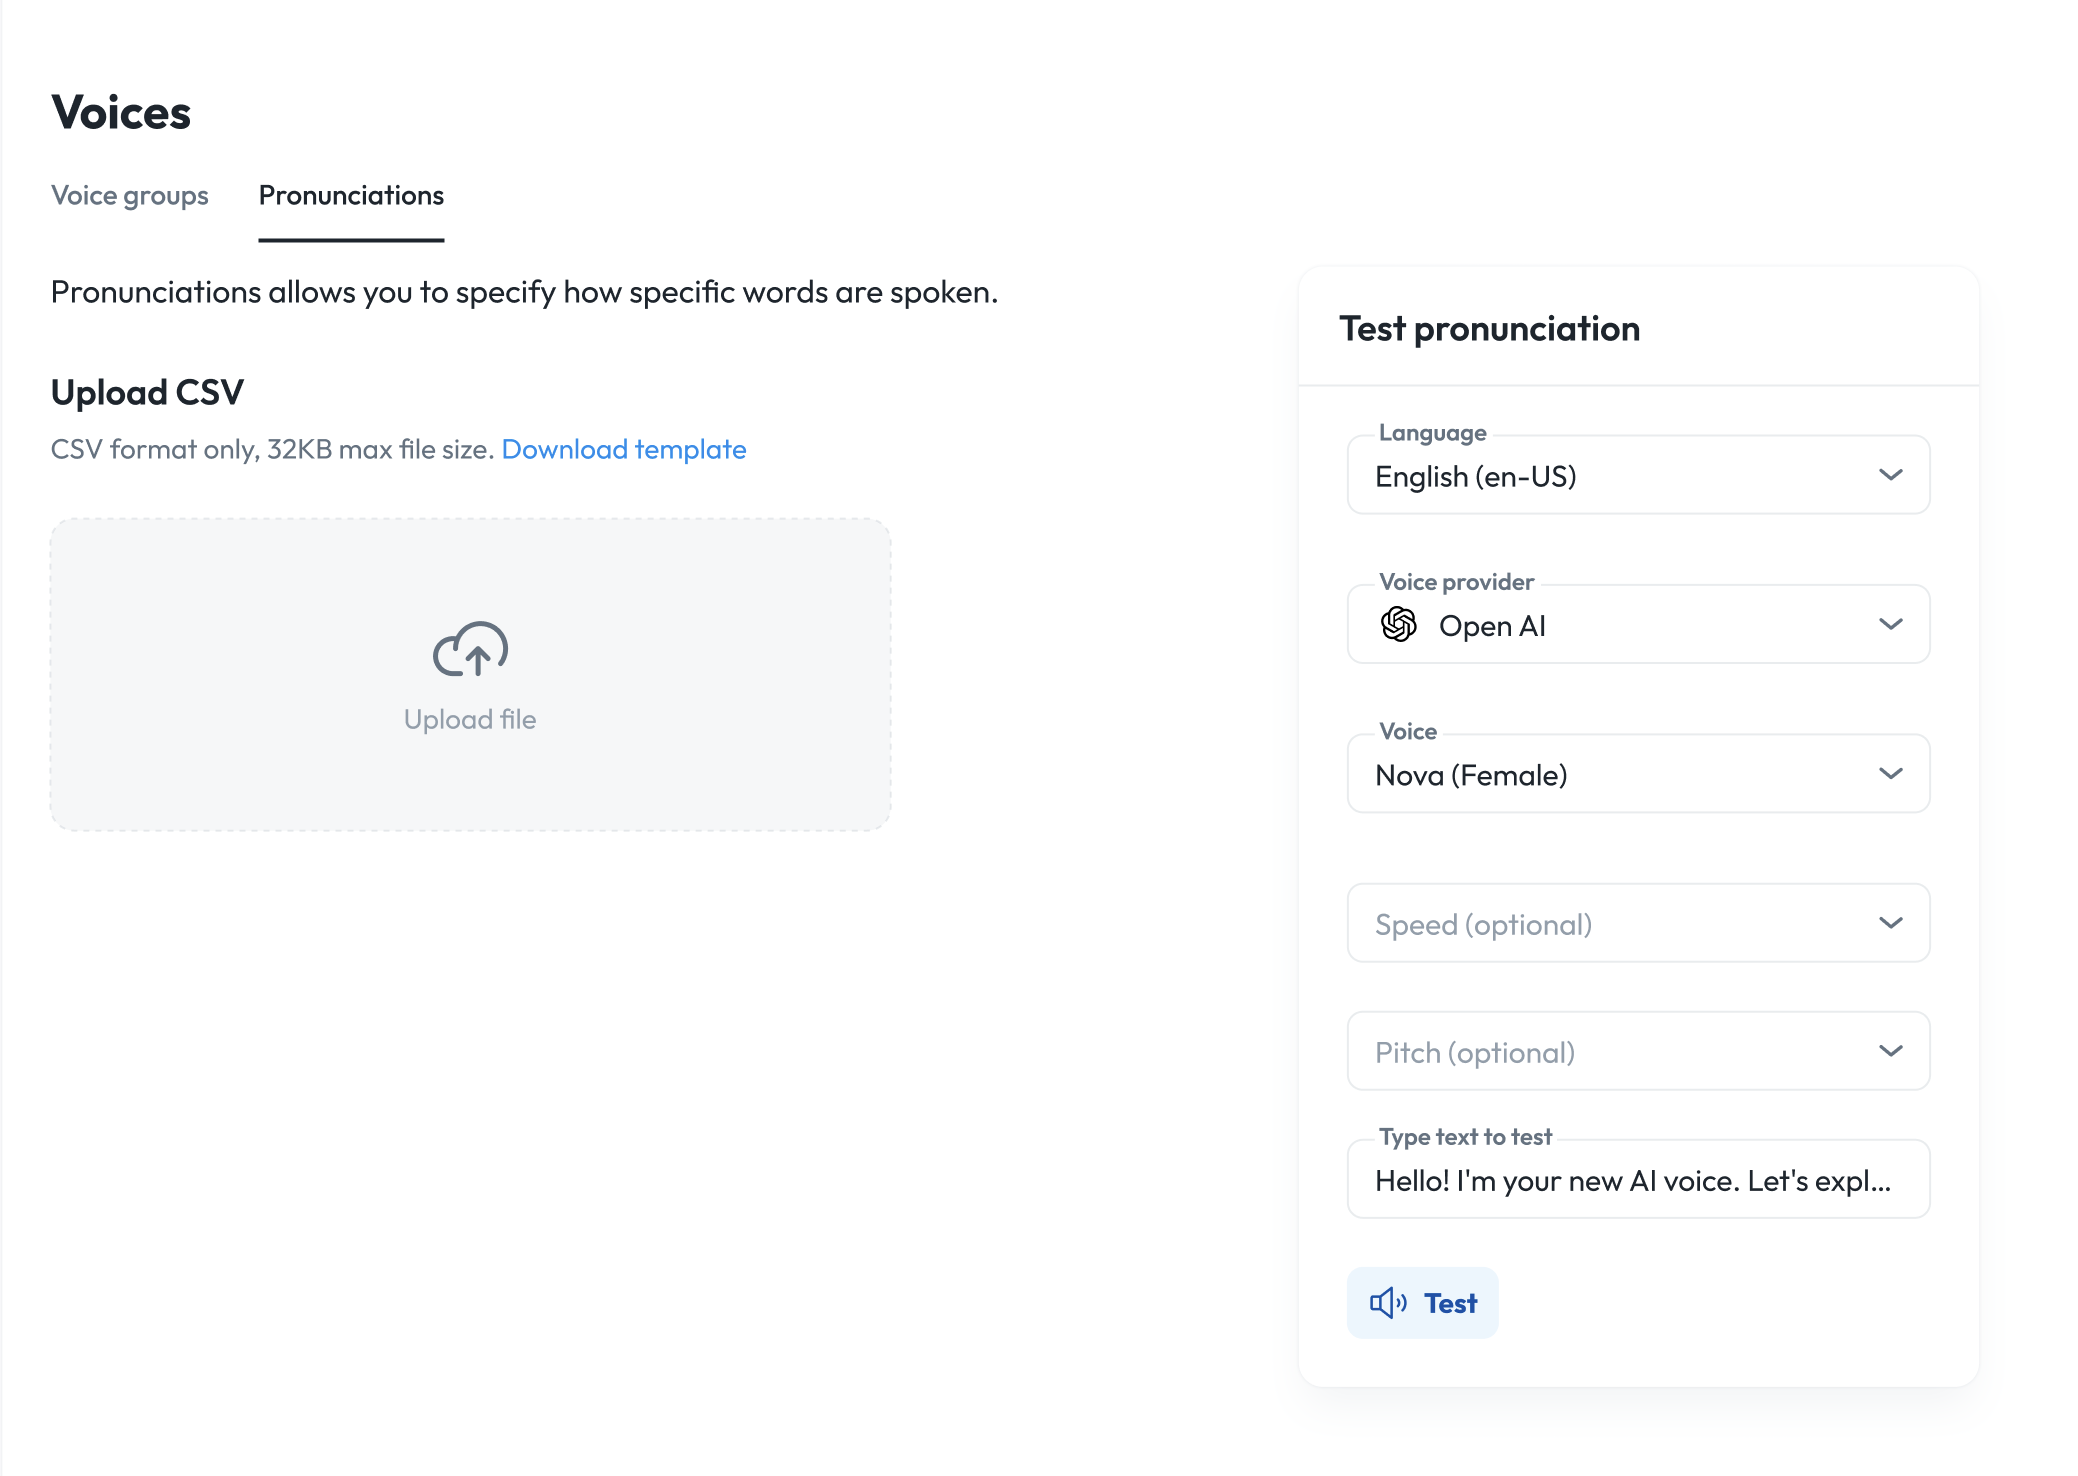
- Click “upload file” or download a sample CSV template, fill it in, and upload.
 Sample CSV template columns
- text: The original word or phrase as it appears in transcripts or responses
- replacement: The phonetic or re-spelled version the TTS engine should use (For example: “kernel” for “colonel”).
- language: The relevant language (e.g., en-US, English, es-US, Spanish, etc.)
Note: There is no limit to the number of entries. Additionally, replacements are case-sensitive and match on the full word (i.e., if you had a replacement for the pronunciation of “pen”, it would not impact how “pen” is pronounced in “pencil”).
Remove pronunciations
When you remove an already uploaded pronunciations CSV file, it will revert to the default TTS model’s pronunciations
Test pronunciations
Pronunciations page displays all pronunciation customizations currently available in your organization. Each entry controls how a particular word or phrase will be spoken by the TTS engine used by your agents.
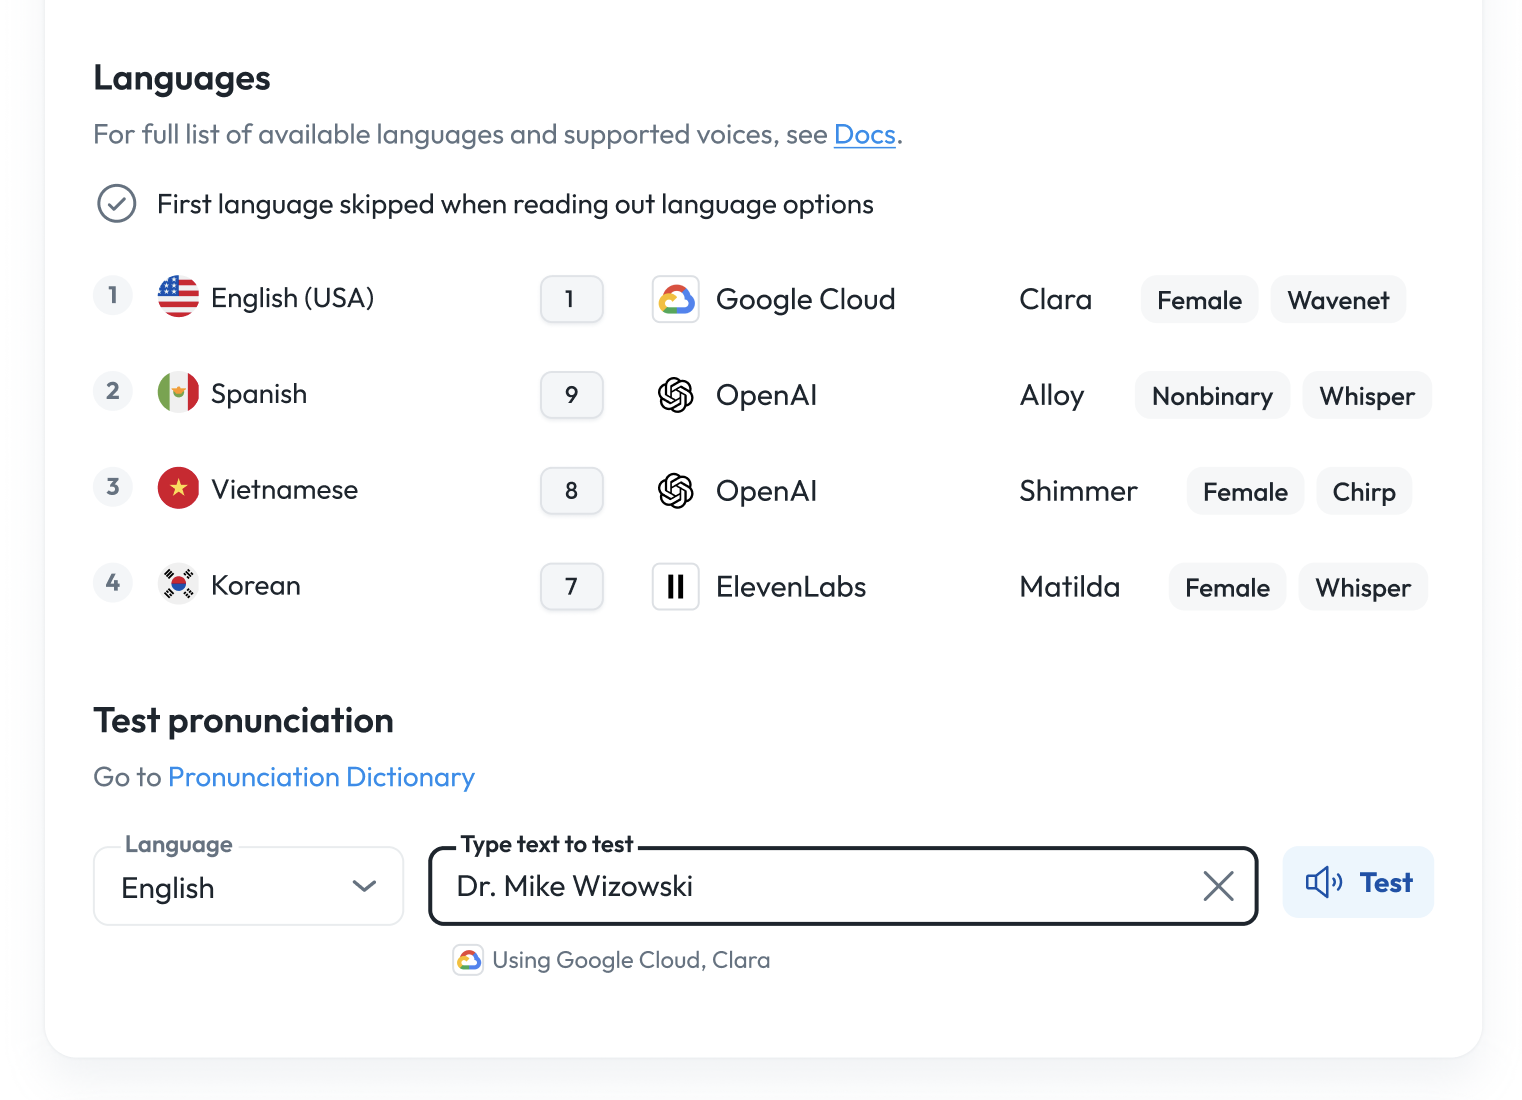
You can either test pronunciations at the organization level or at each voice group level. To test per voice group, click on a voice group and underneath the languages, try out different words to pronounce, for each language.
 Add or update pronunciations
To add or edit pronunciation replacements, you must download the latest CSV, add your changes, and re-upload.
Add or update pronunciations
To add or edit pronunciation replacements, you must download the latest CSV, add your changes, and re-upload.
- Download CSV: Download your current pronunciation table from the Pronunciations page. The CSV will have the following columns: text | replacement | language
- Edit CSV: Add new rows for any words or phrases you wish to customize.
-
Example:

-
Tip: Use respelling or phonetic spelling. You may need to experiment to find the best pronunciation for your TTS voice.
- Upload CSV: Once you have made your changes, upload the CSV back to the platform. The system will immediately begin using your updated pronunciations.
Test pronunciations
You can test how your replacement spellings sound:
- Select a TTS provider, voice, and language
- Enter the replacement text or phrase
- Playback the result to ensure it sounds correct
- Adjust your replacement spelling as needed for clarity or naturalness
Best practices
- Be specific: The text column should match exactly how the word/phrase appears in your outputs.
- Phonetic spelling: Start with simple respellings, but if necessary, use more detailed phonetic hints or hyphenation.
- Language matching: Ensure the language field matches the TTS model you’re targeting.
Notes
- If you want to add more pronunciation replacements, download the latest CSV, add your changes, and re-upload.
- Pronunciation customizations are organization-wide and affect all agents using affected voices and languages.
- There is no limit to the number of entries you can add.
By customizing pronunciations, you ensure your agents speak naturally, improving user experience, and professionalism.